
Wow that interface looks great! But could you just change the button's... [insert typical request] color, size, shape? Does that sound familiar to you?
Well if it does, you're already aware that creating UI is commonly quick moving and highly iterative. It's not uncommon that as your are developing visual solutions, requirements and expectations may change. Maybe the art direction is being updated, or maybe while testing the UI you find that certain elements are being overlooked and that a player isn't fully understanding how to navigate through your menus as intended. Obviously this leads to changes... and I prefer to be able to make those changes as quickly and painlessly as possible. I find that more often than not, it's important to create UI assets that are flexible and easily modified for future modifications.
So all this brings me to this post's topic: The benefits of integrating non-destructive workflows into your daily work.
So what is a non-destructive workflow? It's a practice of future proofing asset creation while not destroying any asset data (or art) that you are concurrently creating. There are two important topics to keep in mind here:
- Are the production assets easily modifiable for future iterations and change requests?
- Have your production methods made any permanant changes to original art assets?
Sounds pretty straightforward, right? In a nutshell, it's about being smart with your UI asset creation. Techniques like using Vector based artwork whenever possible, leveraging Layer Styles to your advantage, Adjustment Layers, Smart Objects and so on. In the event that the previous sentence made no sense to you, check out this TutsPlus tutorial; there are some great examples of non-destructive photoshop techniques. And keep in mind this isn't just about one program in particular, it's about any aspect of asset creation within the game dev pipeline that might benefit.
Benefits
Before I get into a working example of how to use non-destructive techniques to make UI assets in the real world let me stand on my soapbox for a minute. There are a few reasons that we as designers and artists should care about this topic (aside from making our lives easier). Let me share a few examples.
Time Savings - First and maybe the most important reason is that by taking a little bit of additional effort and thought from the beginning could save you (and your coworkers) countless hours in the future. Imagine that you get the call to up-res your UI. Well, if you built your interface in a way that utilized hi-res smart objects or vector layers with layer styles this would be fairly straightforward and low effort. But, if you only had made your assets from raster artwork this could be a huge pain. Which brings me to my second point...
Flexible Artwork - By using non-destructive techniques you are giving your future self a leg up. Resize, recolor, and modify artwork effortlessly and quickly.
Collaboration - Let's imagine you just moved onto a project that is well into production. There is no better feeling than being able to open other colleagues asset files to be greeted with clean, organized files with great use of smart objects, vector source, etc. Be a good coworker and enable others to use your files with ease. This makes getting into a project far easier than having to hunt down source for every art file.
Examples
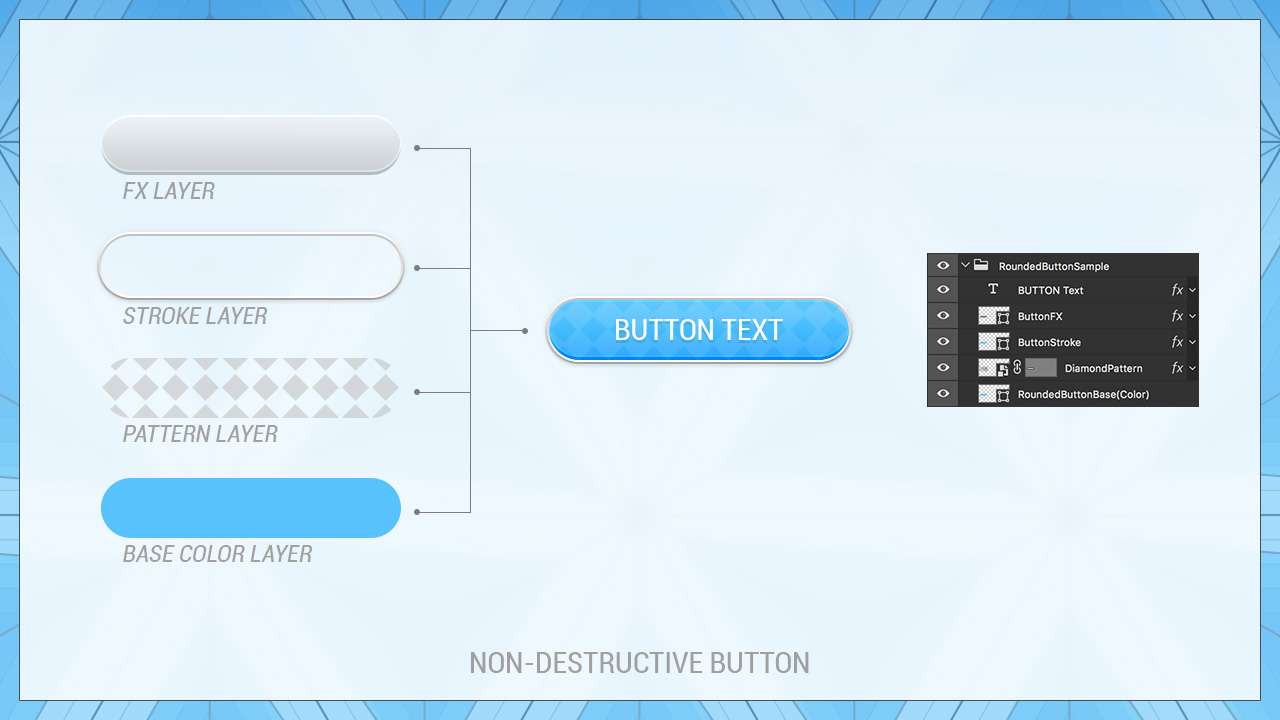
Let's take a look at a non-destructive art asset I've prepared for this post, a somewhat simple button. (Ok, it's super simple - but you can extrapolate the information and methodology to far more complex UI objects.)
In the example on the right, I have a button made from four main components; a pattern layer, some typical fx (gradient, inner shadow, drop shadow, etc), a separated "stroke" layer, and the base color layer. Each layer is vector based, and uses layer style to create the effects. In turn, it's very simple to scale and tweak any of the parameters.
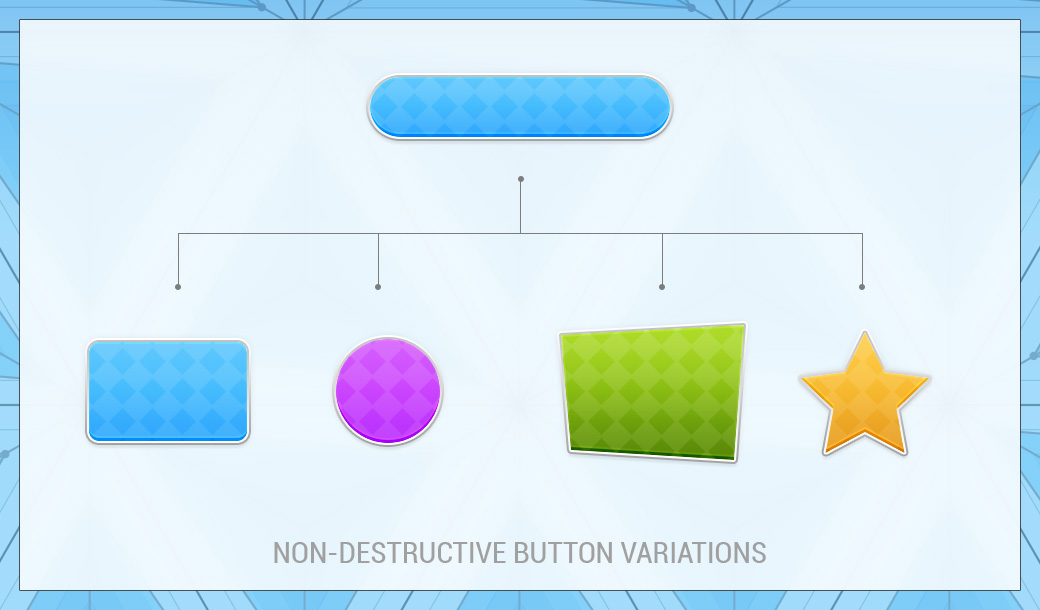
The example on the left shows how the base button can be modified to use different shapes and colors. It took me all of 30 seconds to make each modification. This is powerful because you can iterate and react to changes quickly. Furthermore, you have the ability to tweak the layer styles to your liking without having to set them up from scratch.
Limitations
One area that becomes more difficult to pull off by using non-destructive techniques are hand-painted interfaces, for example a interface like Hearthstone. For these cases (for me) it usually comes down to painting raster artwork at a higher resolution and then converting that to a smart object and used throughout the interface.
One other potential drawback is that it's easy for files to become overly complex if you aren't careful. You can easily go overboard when setting up your assets, but i prefer to err on the side of caution.
Conclusion
I hope I've made the case for integrating non-destructive techniques into your workflow. I'm super passionate that smart workflows can lead to timelier and more efficient interface production. As always, comments are more than welcome.